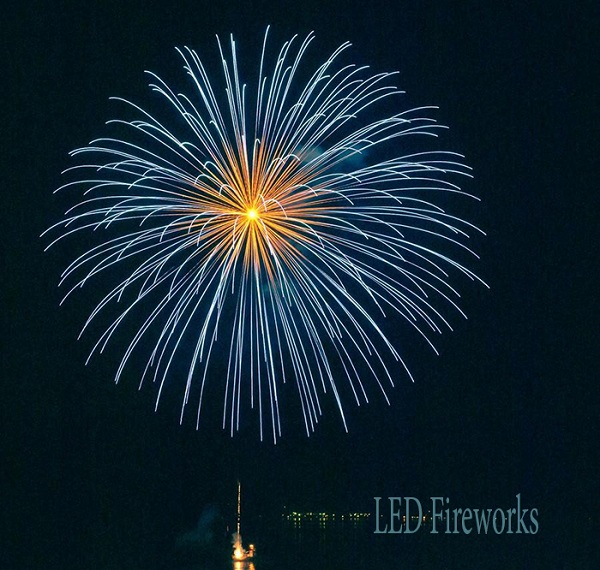
LED фейерверк при помощи Arduino
До Нового Года еще достаточно далеко, но готовиться к нему никогда не рано. Сегодня мы сделаем необычное новогоднее украшение практически из ничего. Большинство материалов для проекта у многих есть дома. Схожие новогодние декорации конечно можно купить готовыми, но обойдутся они значительно дороже.
Материалы
- 50 светодиодов;
- Плата Arduino Nano;
- Адаптер питания 5V 1A;
- Кейс для платы;
- Лист МДФ (ДВП, фанера) 122 cm / 61 cm / 4 mm.
Подготовка каркаса
Далее необходимо вырезать каркас из имеемого листа, как показано на картинке. Сначала срезать бока около ножки. После этого, лобзиком, придать форму короне.


Установка светодиодов
Первые 25 светодиодов крепятся к ножке, остальные 25 – устанавливаются на верхнюю часть.


Подключаем диоды к плате
Мы использовали Arduino Nano, но для проекта подойдут и другие Arduino платы.
Зеленый провод подключаем к D3, желтый – к D2. Питаются светодиоды напрямую от адаптера.

Код
Остается только загрузить код и проект полностью готов к работе. Наш код достаточно прост. Здесь можно поэкспериментировать и придумать что-то более интересное.
/*****************************************************************************
LED fireworks code
  Simple code to initate fireworks with LEDs.
  Written by Bart Bos
Based on:
  Example sketch for driving Adafruit WS2801 pixels!
  Designed specifically to work with the Adafruit RGB Pixels!
  12mm Bullet shape ----> https://www.adafruit.com/products/322
  12mm Flat shape   ----> https://www.adafruit.com/products/738
  36mm Square shape ----> https://www.adafruit.com/products/683
  These pixels use SPI to transmit the color data, and have built in
  high speed PWM drivers for 24 bit color per pixel
  2 pins are required to interface
  Adafruit invests time and resources providing this open source code,
  please support Adafruit and open-source hardware by purchasing
  products from Adafruit!
  Written by Limor Fried/Ladyada for Adafruit Industries.
  BSD license, all text above must be included in any redistribution
*****************************************************************************/
#include "Adafruit_WS2801.h"
#include "SPI.h" // Comment out this line if using Trinket or Gemma
#ifdef __AVR_ATtiny85__
 #include <avr/power.h>
#endif
#define MAXLEDS 50
#define LEDSPART2 24
// Choose which 2 pins you will use for output.
// Can be any valid output pins.
// The colors of the wires may be totally different so
// BE SURE TO CHECK YOUR PIXELS TO SEE WHICH WIRES TO USE!
uint8_t dataPin  = 2;    // Yellow wire on Adafruit Pixels
uint8_t clockPin = 3;    // Green wire on Adafruit Pixels
// Don't forget to connect the ground wire to Arduino ground,
// and the +5V wire to a +5V supply
// Set the first variable to the NUMBER of pixels. 25 = 25 pixels in a row
Adafruit_WS2801 strip = Adafruit_WS2801(MAXLEDS, dataPin, clockPin);
// Optional: leave off pin numbers to use hardware SPI
// (pinout is then specific to each board and can't be changed)
//Adafruit_WS2801 strip = Adafruit_WS2801(25);
// For 36mm LED pixels: these pixels internally represent color in a
// different format.  Either of the above constructors can accept an
// optional extra parameter: WS2801_RGB is 'conventional' RGB order
// WS2801_GRB is the GRB order required by the 36mm pixels.  Other
// than this parameter, your code does not need to do anything different;
// the library will handle the format change.  Examples:
//Adafruit_WS2801 strip = Adafruit_WS2801(25, dataPin, clockPin, WS2801_GRB);
//Adafruit_WS2801 strip = Adafruit_WS2801(25, WS2801_GRB);
#define MAXCOLOR 6
const byte RGBcolor[MAXCOLOR][3] =
{
  {255,   0,   0 },   // red
  {  0, 255,   0 },   // green
  {  0,   0, 255 },   // blue
  {255, 255,   0 },   // orange
  {  0, 255, 255 },   // yellow
  {255,   0, 255 }    // magenta
};
const byte Rings[6][4] =
{
  {  2,  13,  14, 25},   // ring 1
  {  3,  12,  15, 24},   // ring 2
  {  4,  11,  16, 23},   // ring 3
  {  5,  10,  17, 22},   // ring 4
  {  6,   9,  18, 21},   // ring 5
  {  7,   8,  19, 20}    // extra
};
void clearStrip()
{
  for (unsigned int i = 0; i < strip.numPixels(); i++)
  {
    strip.setPixelColor(i, Color(0, 0, 0));
  }
}
void arrowOnly()
{
  clearStrip();
  for (int i = 3; i < 8; i++)
  {
    strip.setPixelColor(i, Color(255, 0, 0));
  }
  strip.show();
  delay(5000);
}
void arrowAlmostOn(int led)
{
  for (int i = 0; i < 100; i++)
  {
      if (i % 2 == 0)
      {
        strip.setPixelColor(led, Color(0, 0, 0));
      }
      else
      {
        strip.setPixelColor(led, Color(i, i, 0));
      }
      strip.show();
      delay(20);
  }
  for (int i = 100; i >= 0; i--)
  {
      strip.setPixelColor(led, Color(i, i, 0));
      strip.show();
      delay(4);
  }
  strip.show();
  delay(2000);
}
void arrowOnIncrease(int led)
{
  for (int i = 0; i < 100; i++)
  {
    if (i % 2 == 0)
    {
      strip.setPixelColor(led, Color(0, 0, 0));
    }
    else
    {
      strip.setPixelColor(led, Color(i, i, 0));
    }
    strip.show();
    delay(20);
  }
}
void arrowOnOff(int led)
{
  for (int i = 0; i < 100; i++)
  {
    if (i % 2 == 0)
    {
      strip.setPixelColor(led, Color(0, 0, 0));
    }
    else
    {
      strip.setPixelColor(led, Color(100, 100, 0));
    }
    strip.show();
    delay(20);
  }
}
void arrowOnDecreaseIncrease(int led1, int led2)
{
  for (int i = 0; i <= 100; i++)
  {
    if (i % 2 == 0)
    {
      strip.setPixelColor(led1, Color(0, 0, 0));
      strip.setPixelColor(led2, Color(0, 0, 0));
    }
    else
    {
      strip.setPixelColor(led1, Color(100 - i, 100 - i, 0));
      strip.setPixelColor(led2, Color(i, i, 0));
    }
    strip.show();
    delay(20);
  }
}
void arrowOn()
{
  arrowAlmostOn(0);
  arrowAlmostOn(0);
  arrowOnIncrease(0);
  arrowOnOff(0);
  arrowOnDecreaseIncrease(0,1);
  arrowOnOff(1);
  arrowOnDecreaseIncrease(1,2);
  arrowOnOff(2);
}
void arrowGo()
{
  int i, j;
  for (j = 3; j <= LEDSPART2 + 1; j++)
  {
    clearStrip();
    strip.setPixelColor(j - 1, Color(0, 0, 0));
    for (i = j; i < j + 5; i++)
    {
      if (i <= LEDSPART2) strip.setPixelColor(i, Color(255, 0, 0));
    }
    strip.show();   // write all the pixels out
    delay(5);
    strip.setPixelColor(j - 1, Color(255, 255, 255));
    strip.show();   // write all the pixels out
    delay(5);
  }
}
void arrowExplodeExplosion(byte ring, byte nr, byte r, byte g, byte b)
{
  byte lr, lg, lb;
  for (int i = 0; i < nr; i++)
  {
    lr = 0; lg = 0; lb = 0;
    if (i % 2 == 0) { lr = r; lg = g; lb = b; }
    if (ring == 0) strip.setPixelColor(LEDSPART2 + 1, Color(lr, lg, lb));
    for (byte j = 0; j < 4; j++)
    {
      strip.setPixelColor(LEDSPART2 + Rings[ring][j], Color(lr, lg, lb));
    }
    strip.show();
    delay(10);
  }
}
void arrowExplodeRing(byte ring, byte r, byte g, byte b)
{
  for (int i = 0; i < 10; i++)
  {
    if (i % 2 == 0)
    {
      if (ring == 0) strip.setPixelColor(LEDSPART2 + 1, Color(0, 0, 0));
      for (byte j = 0; j < 4; j++)
      {
        strip.setPixelColor(LEDSPART2 + Rings[ring][j], Color(0, 0, 0));
      }
    }
    else
    {
      if (ring == 0) strip.setPixelColor(LEDSPART2 + 1, Color(r, g, b));
      for (byte j = 0; j < 4; j++)
      {
        strip.setPixelColor(LEDSPART2 + Rings[ring][j], Color(r, g, b));
      }
    }
    strip.show();
    delay(10);
  }
  if (ring == 0) strip.setPixelColor(LEDSPART2 + 1, Color(r, g, b));
  for (byte j = 0; j < 4; j++)
  {
    strip.setPixelColor(LEDSPART2 + Rings[ring][j], Color(r, g, b));
  }
  strip.show();
}
void arrowExplodeRingAll(byte ring, byte r, byte g, byte b)
{
  for (int i = 0; i < 10; i++)
  {
    if (i % 2 == 0)
    {
      if (ring == 0) strip.setPixelColor(LEDSPART2 + 1, Color(0, 0, 0));
      for (byte k = 0; k <= ring; k++)
      {
        for (byte j = 0; j < 4; j++)
        {
          strip.setPixelColor(LEDSPART2 + Rings[k][j], Color(0, 0, 0));
        }
      }
    }
    else
    {
      if (ring == 0) strip.setPixelColor(LEDSPART2 + 1, Color(r, g, b));
      for (byte k = 0; k <= ring; k++)
      {
        for (byte j = 0; j < 4; j++)
        {
          strip.setPixelColor(LEDSPART2 + Rings[k][j], Color(r, g, b));
        }
      }
    }
    strip.show();
    delay(10);
  }
}
void arrowExplodeRingOff(byte ring, byte i, byte r, byte g, byte b)
{
  if (i <= r) r = r - i;
  if (i <= g) g = g - i;
  if (i <= b) b = b - i;
  if (ring == 0) strip.setPixelColor(LEDSPART2 + 1, Color(r, g, b));
  for (byte j = 0; j < 4; j++)
  {
    strip.setPixelColor(LEDSPART2 + Rings[ring][j], Color(r, g, b));
  }
}
void arrowExplode(byte r, byte g, byte b)
{
  clearStrip();
  arrowExplodeExplosion(0, 50, 255, 255, 255);
  for (byte i = 0; i < 5; i++)
  {
    arrowExplodeRingAll(i, r, g, b);
  }
  arrowExplodeExplosion(4, 30, 255, 255, 255);
  arrowExplodeRing(4, r, g, b);
  arrowExplodeExplosion(5, 30, r, g, b);
  arrowExplodeRing(5, r, g, b);
  for (int i = 0; i <= 511; i++)
  {
    if (i <= 255) arrowExplodeRingOff(0, i, r, g, b);
    if ((i >= 64) && (i <= 319)) arrowExplodeRingOff(1, i - 64, r, g, b);
    if ((i >= 128) && (i <= 383)) arrowExplodeRingOff(2, i - 128, r, g, b);
    if ((i >= 192) && (i <= 447))
    {
      arrowExplodeRingOff(3, i - 192, r, g, b);
      arrowExplodeRingOff(5, i - 192, r, g, b);
    }
    if ((i >= 256 && (i <= 511))) arrowExplodeRingOff(4, i - 256, r, g, b);
    strip.show();
    delay(5);
  }
}
void arrowDone()
{
  clearStrip();
  strip.show();
  delay(10000);
}
/* Helper functions */
// Create a 24 bit color value from R,G,B
uint32_t Color(byte r, byte g, byte b)
{
  uint32_t c;
  c = r;
  c <<= 8;
  c |= g;
  c <<= 8;
  c |= b;
  return c;
}
void setup()
{
#if defined(__AVR_ATtiny85__) && (F_CPU == 16000000L)
  clock_prescale_set(clock_div_1); // Enable 16 MHz on Trinket
#endif
  strip.begin();
  // Update LED contents, to start they are all 'off'
  strip.show();
}
void loop()
{
  byte nr = random(MAXCOLOR);
  arrowOnly();
  arrowOn();
  arrowGo();
  arrowExplode(RGBcolor[nr][0], RGBcolor[nr][1], RGBcolor[nr][2]);
  arrowDone();
}
На этом все. Проект полностью работоспособен. Остается только дождаться Нового Года.
Статья является авторским переводом с сайта instructables.com.
Данная статья является собственностью Amperkot.ru. При перепечатке данного материала активная ссылка на первоисточник, не закрытая для индексации поисковыми системами, обязательна.
Комментарии